
Average Price Reduction After Home Inspection (Break Down)

So, you’ve found a house you love. The offer’s accepted. You’re already picturing where the couch will go. 

Then the home inspection report lands in your inbox, and suddenly, things don’t look quite so perfect. Maybe the roof needs attention. Maybe there’s a mystery leak in the basement. 

This is the part of the process where numbers start shifting, and for a lot of buyers and sellers, it’s where the real deal happens.

Price reductions after inspections are completely normal. In fact, they’re one of the most common parts of a real estate transaction.

In this post, we’ll break down the average price reduction after home inspections.

Why Do Inspections Lead To Price Reductions?

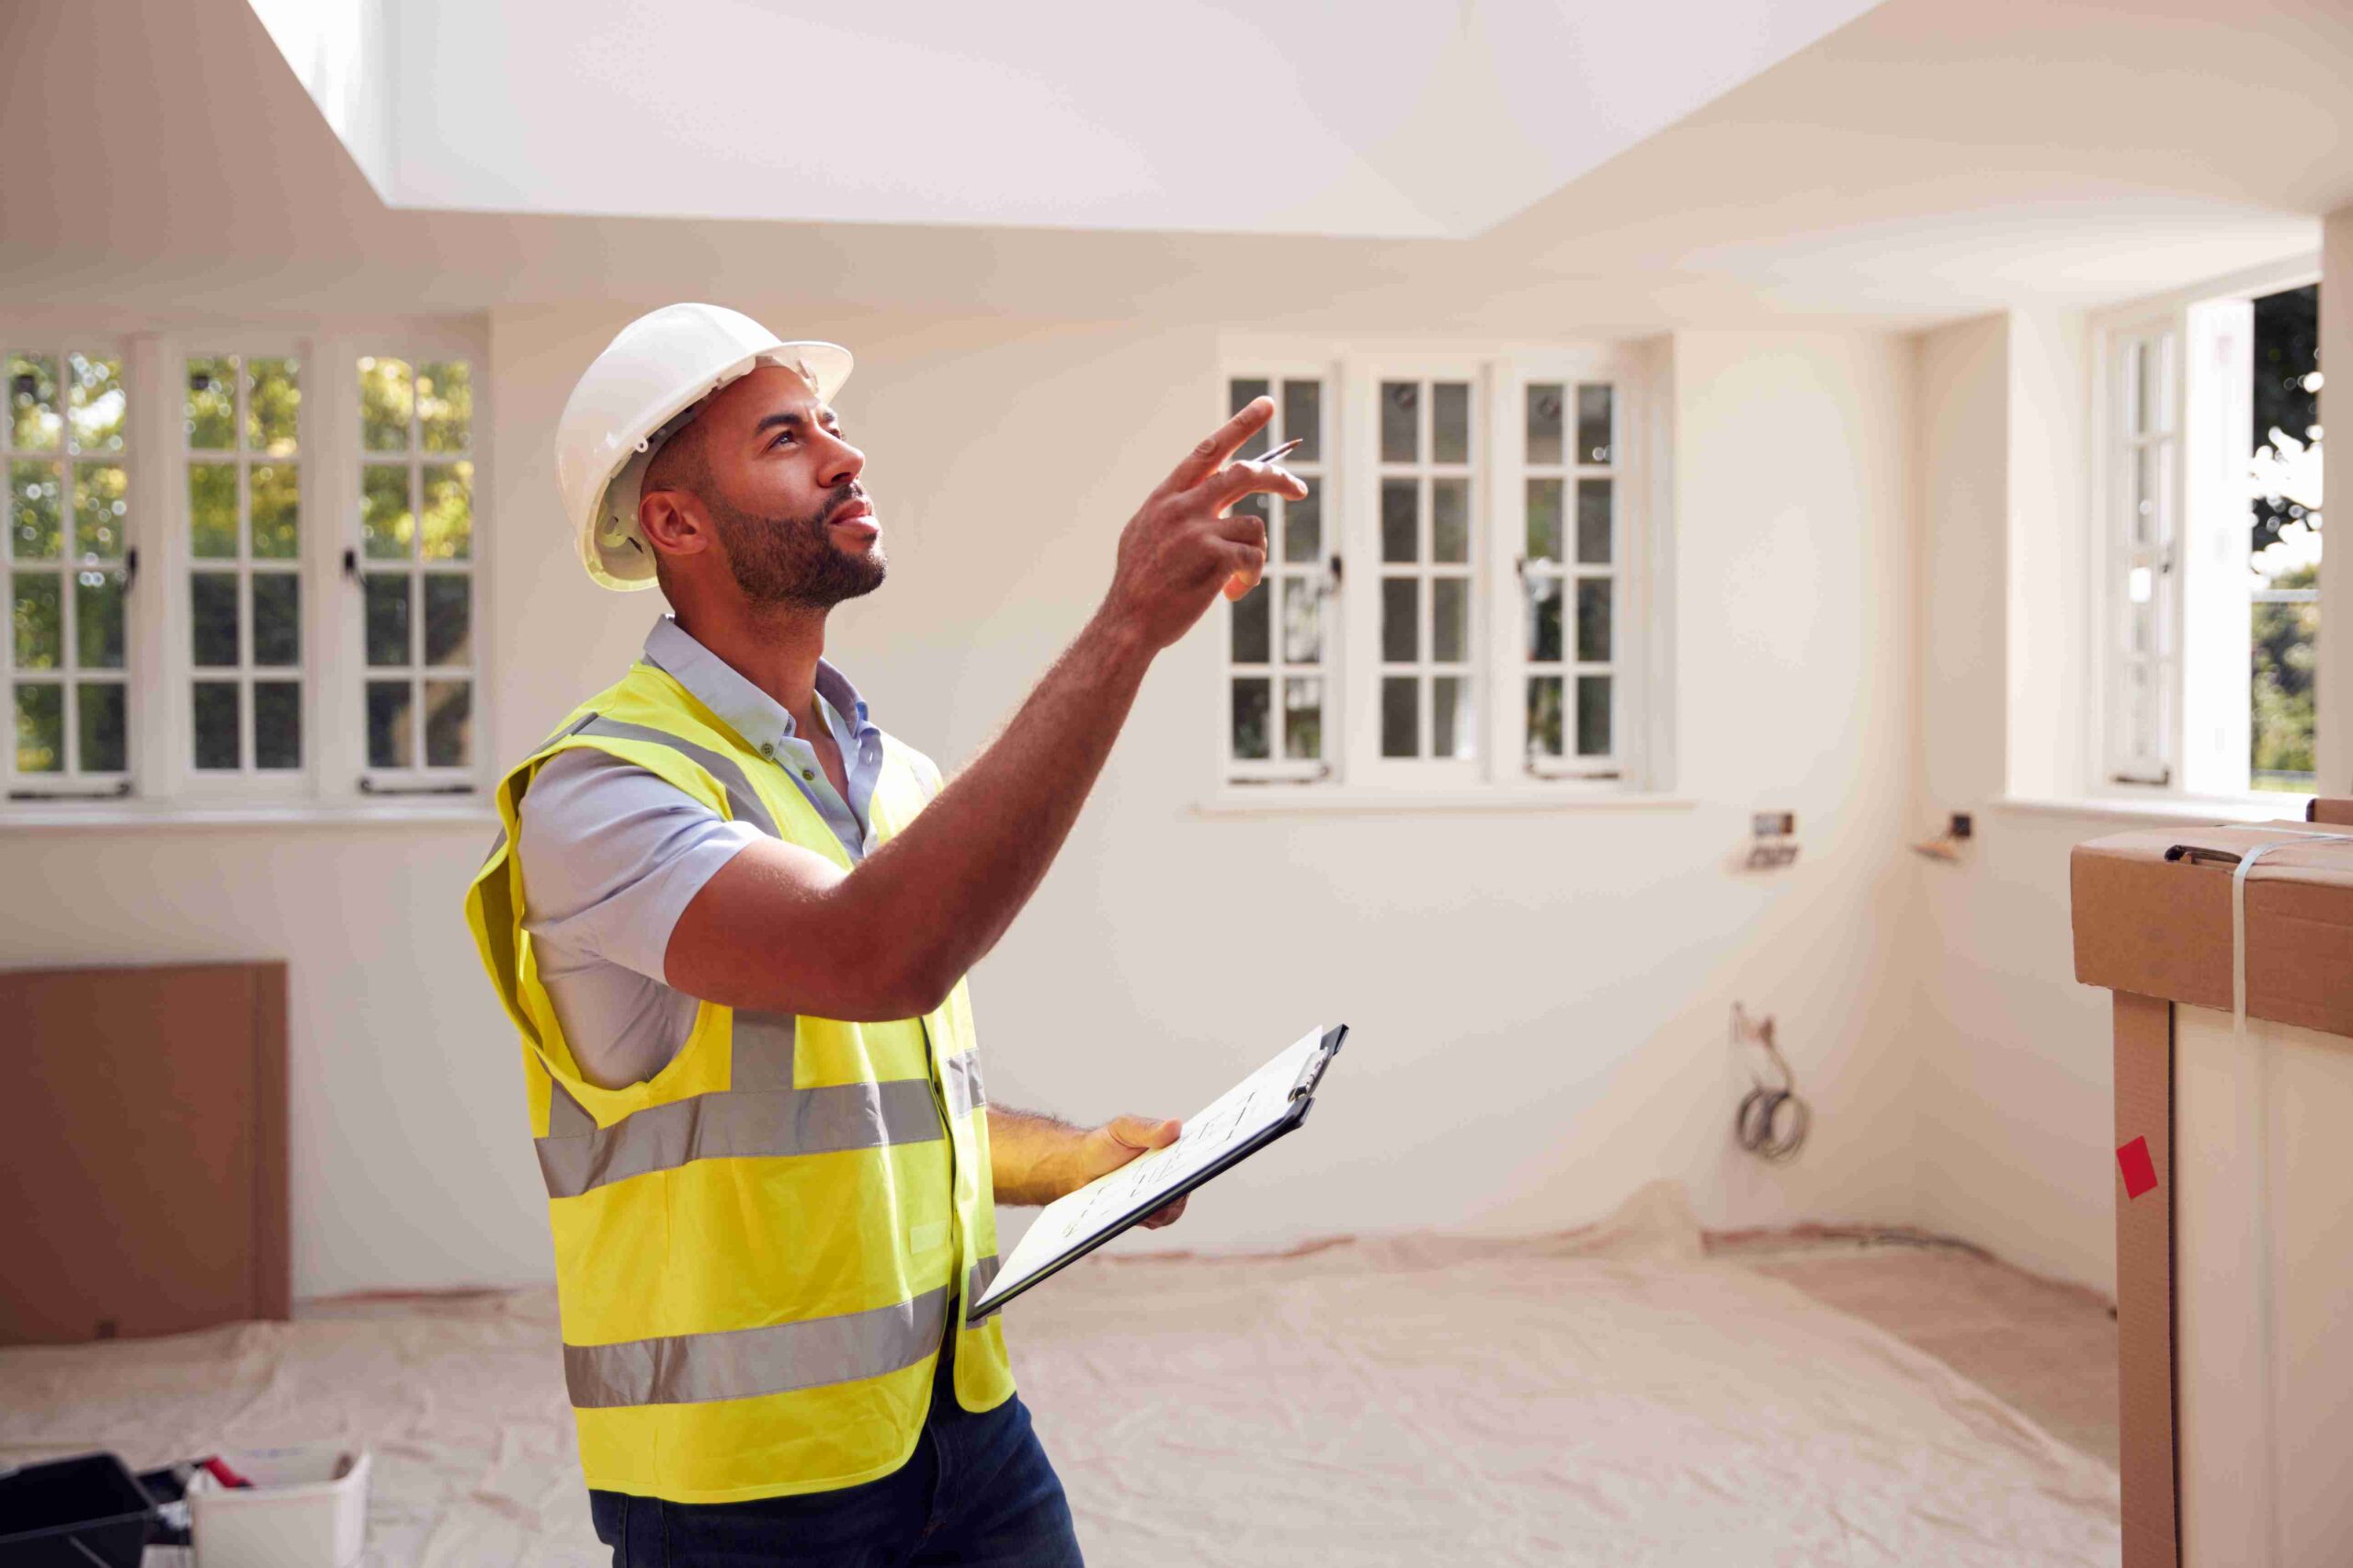
A home inspection pulls back the curtain. 

It finds all things that could cost real money down the line. 

Buyers rely on inspections to make sure they know exactly what they’re getting into. Sellers often think their house is in “pretty good shape,” but inspectors have a way of spotting things that most people never notice.

Once that report comes in, buyers usually do one of three things: 

  1. Accept the house as-is
  2. Walk away
  3. Renegotiate

Most land on renegotiation. If the home has significant issues, it’s only natural for buyers to ask for a price reduction or some kind of credit to cover those future costs.

Why Do Inspections Lead To Price Reductions

Also Read: Can I Do My Own Home Inspection?

The Average Price Reduction After Home Inspection

The average price reduction after a home inspection lands between $2,000 and $12,000, but it really depends on the condition of the home, the market, and how buyers and sellers negotiate. 

Here’s a quick breakdown of the prices:

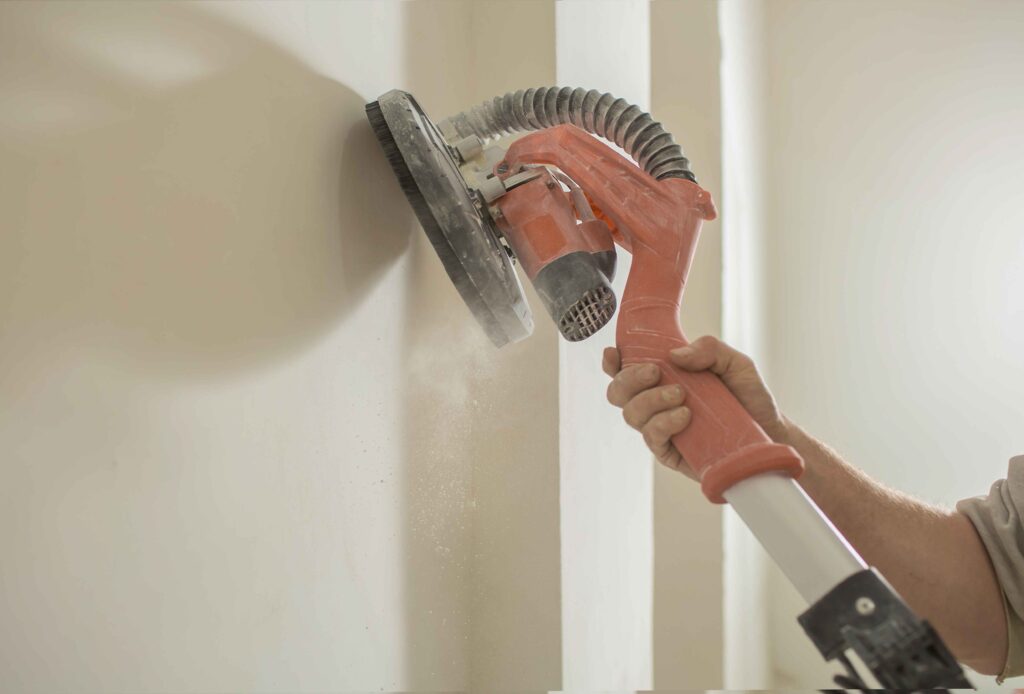
  • Minor issues (cosmetic fixes, small repairs): $1000 – $2,000.
  • Moderate issues (roof repairs, HVAC, plumbing, outdated electrical): $2,000 – $7,500
  • Major issues (foundation cracks, mold, structural problems, major system replacements): $12,000+

In some major cases, the buyers might ask the seller to fix the problems before closing instead.

Common Issues That Trigger Price Adjustments

Certain problems show up again and again in inspection reports. They’re the usual suspects that push buyers to renegotiate. Here are a few of the most common:

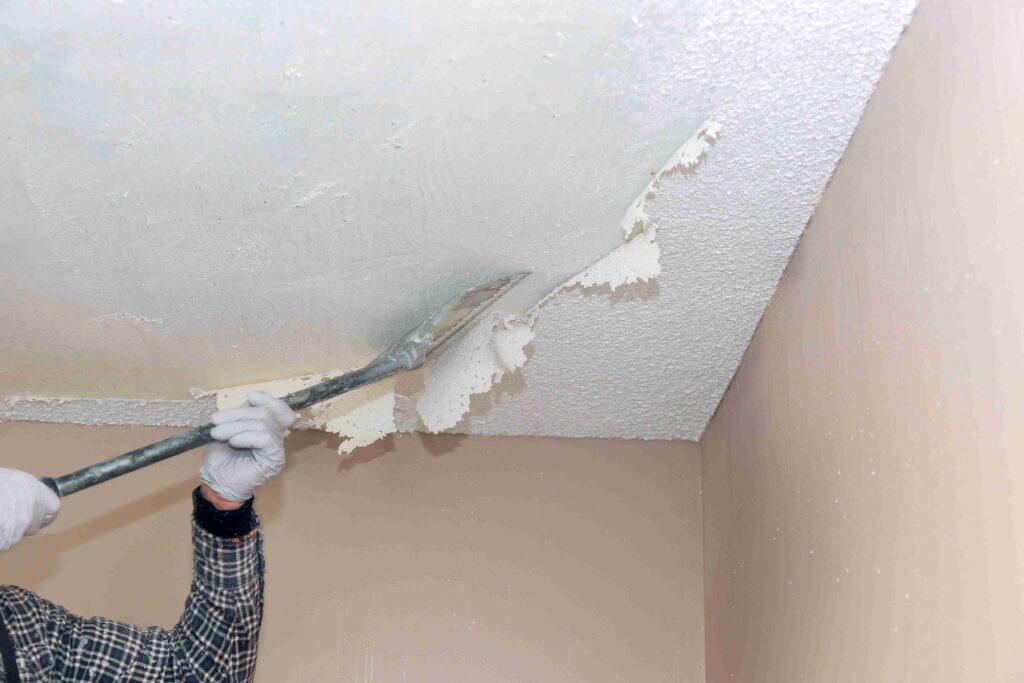
  • Roofs near the end of their life expectancy
  • Old or inefficient HVAC systems
  • Leaking pipes or outdated plumbing
  • Electrical systems that don’t meet modern codes
  • Water damage, mold, or foundation cracks

The more expensive the repair, the more likely the buyer will ask for a price adjustment. 

Sometimes it’s not about the cost alone, it’s also about the hassle factor. If a buyer imagines tearing apart a kitchen to fix plumbing, they might push harder for a credit.

Also Read: 10 Things That Fail A Home Inspection

Factors That Influence The Final Number

Not every home inspection leads to the same kind of price drop. 

A lot of little factors can shape the final number:

#1 Age And Condition Of The Home

An older house will almost always come with a longer list of “issues.” 

Some might be expected, like worn shingles or dated wiring. Others might be surprises. Buyers usually understand that a home built decades ago won’t be flawless, but bigger repairs can still lead to negotiations. 

Newer homes might not have as many problems, so price adjustments are often smaller.

#2 Size And Cost Of Needed Repairs

The bigger and more expensive the fix, the more leverage buyers have to ask for a price reduction. 

Buyers often bring in contractors to get repair estimates before making their requests. These estimates give their negotiation more weight and make it harder for sellers to argue.

Issues That Trigger Price Adjustments

It’s not just about the price tag of the repair either. Complexity matters. 

A repair that requires tearing up floors or walls might come with extra hassle and hidden costs. Buyers factor that in too. 

The easier a fix is to handle, the less it usually impacts the price reduction.

Also Read: Who Verifies Repairs After Home Inspection?

#3 Market Conditions (Buyer’s Vs. Seller’s Market)

Market trends can completely change the tone of these conversations. 

In a hot seller’s market, sellers know they have the upper hand. If a buyer pushes too hard after inspections, there’s often another offer waiting. 

In that kind of market, buyers might accept smaller credits or skip certain requests just to keep the deal alive.

In a buyer’s market, sellers are more motivated to negotiate because they can’t afford to lose a serious buyer. Buyers can use inspection findings to push for larger credits or price reductions, and sellers are more likely to agree just to keep the sale on track. 

#4 How Skilled Each Party’s Agent Is At Negotiating

This part is often overlooked but can make a huge difference.

A good agent can make or break this stage. 

Some know how to position repair requests in a way that gets results without making the other side defensive. Others might come in too aggressively or cave too quickly.

Strong negotiation skills can help both parties find a middle ground that keeps everyone happy.

How Buyers And Sellers Usually Handle It

Once the inspection report is out, both sides usually have a short window to figure out next steps. There are a few common ways they handle things:

Some buyers ask for a price reduction, lowering the purchase price to reflect the needed repairs. 

Others prefer a seller credit at closing, which gives them funds to handle repairs after they move in. This is often cleaner from a paperwork standpoint and can be appealing to both parties. 

Then there’s the seller repair route, where the seller agrees to fix certain items before closing.

Each option has its pros and cons. Price reductions can lower mortgage amounts, which buyers love. Credits let buyers control the quality of repairs. Seller repairs can keep things simple for buyers who don’t want to handle work themselves. 

It usually comes down to what makes the deal easiest for both sides.

When A Deal Might Fall Apart

Not every inspection negotiation ends with a handshake. 

Sometimes the list of problems is just too overwhelming. Maybe the foundation is cracked in multiple places, or mold has spread behind the walls. Maybe the buyer expected some repairs but not tens of thousands in surprise costs. 

If neither side is willing to budge, deals can fall through.

Walking away might sound disappointing, but sometimes it’s the smarter move. 

It saves buyers from taking on a financial headache and gives sellers a chance to address the issues for the next offer. 

Bottom Line

The average price reduction after a home inspection lands between $2,000 and $12,000. The exact number depends on the home’s condition, the market, and how well everyone negotiates.

Remember, price reductions after inspections are just part of buying and selling a home. It’s not a sign that the deal is falling apart.

Going in prepared makes the process smoother. 

For buyers, that means understanding what issues really matter and getting solid repair estimates. For sellers, it means staying flexible and realistic about the home’s condition. 

Who Verifies Repairs After Home Inspection? (Explained)

So, you’ve made it past the nerve-wracking part of buying a house, the home inspection. 

The inspector handed you a report that looked like a grocery list of everything that’s wrong, and now the seller has promised to make some fixes. Great, right? 

But how do you know those repairs actually got done, and done properly? 

Repairs don’t just magically get double-checked. Someone has to confirm them, and it’s not always the same person in every situation.

In this post, we’ll go over who verifies repairs after a home inspection.

#1 The Buyer (Or Their Real Estate Agent)

The buyer has to verify repairs after a home inspection.

The buyer has the most at stake. You’re the one paying for the house, so making sure the agreed repairs are complete is on you. 

That doesn’t mean you’re climbing into the attic with a flashlight or testing the electrical panel yourself. But you can absolutely do a quick look during the final stages to see if obvious repairs have been handled.

Your real estate agent will help you with this too. 

Agents have seen this process hundreds of times, so they know what to look for. They’ll help you follow up with the seller, request documentation, and push for accountability. 

The Buyer Or Their Real Estate Agent

If something looks off, they’re often the first to raise a red flag.

Also Read: Can I do my own home inspection?

If the seller promised a roof repair, you want proof the work was done by someone qualified, not just patched up with a roll of duct tape

#2 A Re-Inspection By The Home Inspector

A lot of people think the original home inspector automatically comes back to check repairs. 

Nope. Once the inspection report is finished, their job is technically done. If you want them back, you usually have to schedule (and pay for) a re-inspection.

Re-inspections are optional, but they can be worth the peace of mind. 

The inspector will focus only on the repairs that were agreed to, not re-inspect the whole house. 

Did the plumber really fix that leaky pipe? Did the seller actually replace the faulty GFCI outlets? An inspector can give you a straight answer.

Some buyers skip this step to save a little money, but in cases of big repairs (like structural fixes, foundation work, or electrical updates), it’s smart to spend the extra for a pro’s opinion. 

It’s better than moving in and discovering the “repairs” were more of a quick cover-up.

#3 Licensed Contractors

When repairs involve skilled trades (plumbing, electrical, roofing, or HVAC), you’ll usually want receipts or documentation from licensed contractors. 

Sellers often hire professionals for these jobs anyway, because they need the work done correctly to avoid future liability.

Here’s where you can ask for proof. A copy of an invoice, a warranty for new parts, or even a contractor’s business card attached to the paperwork goes a long way. 

Also Read: Should I Get A Radon Test With Home Inspection?

That way you’re not just taking the seller’s word for it.

If the water heater was replaced, you want to know who did it and when, so you’re not left scrambling for answers if it fails six months after closing.

Checking Repairs After Home Inspection

Here are some simple things buyers should ask to see from contractors:

  • Invoices or receipts showing what was fixed or replaced
  • Warranties or guarantees on the work or parts
  • Contact details of the contractor in case you need follow-up

That little bit of paperwork can save a ton of headaches down the road.

#4 Appraiser (Sometimes)

Here’s one a lot of people don’t think about: the appraiser. 

If you’re using a loan backed by FHA, VA, or USDA, the lender might require the appraiser to confirm certain repairs before approving the loan. 

These repairs usually have to do with safety or livability.

For example, FHA doesn’t want peeling lead paint or missing handrails. VA won’t sign off on a house with major roof leaks. In those cases, the appraiser has to go back out and verify the fixes were completed before the loan can close.

This doesn’t happen with every sale, and it’s not a substitute for you doing your own verification. 

But it’s another layer of protection built into certain loan types. 

The Final Walkthrough Before Closing

This is your big moment. 

The final walkthrough is usually scheduled a day or two before closing. 

It’s your chance to see the house one last time and confirm that repairs were made and the property is in the same condition as when you agreed to buy it.

You’re not doing a full inspection here and it’s more of a sanity check. 

Did the seller remove their stuff? Did the new appliances show up? Are those repairs you negotiated actually visible and functional?

Also Read: How Long Does A Home Inspection Take?

Bring your agent along, and take the inspection report with you. That way you can quickly glance at the items that were supposed to be addressed and confirm they’re done. 

If something’s missing, this is the last chance to speak up before you sign the mountain of closing paperwork.

One quick tip: test the stuff that’s easy to overlook. 

Flip on the lights, run the faucets, check that the heat or AC turns on. It only takes a few minutes, and it’s way better to find problems now than after the keys are in your hand.

Bottom Line

Verifying repairs after a home inspection falls on the buyer. They have to push for proof and make sure everything is squared away before closing. 

Sometimes your agent helps. Sometimes an inspector comes back for a re-inspection. Contractors provide receipts. And in certain loan situations, even the appraiser might step in.

The smartest move is to combine a few methods: get documentation for major repairs, schedule a re-inspection if the fixes were big, and always do a careful final walkthrough. 

That way you’re not left with unpleasant surprises after move-in day.

Verifying repairs gives you the peace of mind that the place is truly ready for you.

Can I Do My Own Home Inspection? (Explained)

Buying a home is a big deal. For most people, it’s the largest purchase they’ll ever make. That’s why home inspections are such a common step in the process. 

But if you’re the type who likes to save money and take matters into your own hands, you might be wondering if you can do your own home inspection. 

You can do a basic walkthrough and spot a lot of surface-level issues. But there’s a big difference between your quick check and a professional inspection. 

That difference can save you stress, money, and some nasty surprises down the line.

In this post, we’ll explain if you can do your own home inspection.

Can I Do My Own Home Inspection?

You can walk through a home yourself and look for red flags, but doing your own inspection isn’t the same as a professional home inspection. 

A licensed home inspector is trained to catch details most buyers miss.

That said, you can absolutely do a personal walkthrough before (or even in addition to) hiring an inspector. Think of it as a way to spot obvious issues early, so you don’t waste time or money on a place that has big problems.

Also Read: The 12 Types Of Home Inspections

Here are some things you can check on your own:

  • Look for water stains, mold, or damp smells.
  • Test faucets, toilets, and showers for proper function and drainage.
  • Flip light switches and check outlets.
  • Peek in the attic and basement for leaks, pests, or structural issues.
  • Inspect doors, windows, and floors for unevenness, drafts, or cracks.
  • Walk around the exterior for roof damage, foundation cracks, or grading issues.

You can do a basic inspection yourself, but it won’t replace the thoroughness of a professional.

DIY Home Inspection

Most buyers still hire an inspector because missing a hidden problem (like faulty wiring or foundation damage) can cost way more than the inspection fee.

Limitations Of Doing Your Own Home Inspection

Homes are complicated. You can spot some obvious issues on your own, but the sneaky stuff often hides in places you’d never think to check. 

For example, you might notice a crack in the basement wall, but you won’t know if it’s just cosmetic or a sign of foundation trouble. You can run the shower, but you probably won’t crawl into the crawlspace to see if the drain pipe is leaking behind the wall. 

And while you can glance at the roof, you likely won’t spot early signs of shingle damage or ventilation issues.

Also Read: Things That Fail A Home Inspection

Another big challenge is experience. 

A professional inspector has seen hundreds of homes. They know what a normal amount of wear looks like and what could be the start of a big, expensive problem. 

As a buyer, you might overreact to small cosmetic things and completely miss bigger underlying issues.

So yes, your walkthrough is helpful. But without the training, tools, and background knowledge, you risk missing something that could cost thousands down the line.

Benefits Of Hiring A Professional Inspector

A licensed inspector brings much more to the table than just a second pair of eyes. They have the skills, tools, and impartial mindset to uncover problems you might never notice. 

Here’s what makes professional inspections worth the money:

Expertise And Experience

Inspectors have gone through specific training, certifications, and countless hours in the field. They’ve seen the good, the bad, and the truly ugly when it comes to homes. 

Because of this, they know the difference between minor wear and tear and something that could turn into a nightmare repair. 

That experience helps them notice patterns and spot subtle clues you’d likely walk right past.

Benefits Of Hiring A Professional Inspector

Also Read: Things To Check Off When Choosing Your Next Home Inspector

Specialized Equipment

Your eyes and a flashlight can only get you so far. 

Inspectors show up with tools that take the guesswork out of things. 

Moisture meters can detect water damage hidden behind walls. Infrared cameras reveal insulation gaps and overheating electrical systems. Outlet testers confirm wiring is safe and up to code. 

Even something as simple as a ladder lets them check areas most buyers wouldn’t touch. 

These tools often expose issues long before they become obvious.

Unbiased And Objective Assessment

Buying a home comes with emotions. Maybe you love the neighborhood or you’ve already pictured where the couch will go. 

That excitement can make it easy to downplay problems. 

Inspectors don’t have that attachment. They’re not trying to talk you into or out of the house—they’re simply reporting the facts. 

That objectivity ensures you’re getting a clear, honest picture of the home’s condition.

Comprehensive Reports

Once the inspection is done, you’re not just handed a quick summary. Inspectors provide detailed reports, often complete with photos and explanations. 

These reports break down what’s wrong, what might need attention soon, and what’s just cosmetic. They’re written in a way that helps you understand the seriousness of each issue. 

Even better, these reports become valuable bargaining chips during negotiations. 

You can use them to ask for repairs, request a price reduction, or plan your future maintenance budget.

We Recommend Doing Both!

The smartest strategy is to use both approaches together. 

Do your own walkthrough first. That way, you can weed out houses with obvious problems before paying for a pro. 

If the place passes your basic check, then bring in a licensed inspector to dig deeper.

This two-step process saves you time, money, and stress. 

Imagine spotting a sagging roof on your own and deciding not to waste money on an inspection. Or finding a house that looks great to you but has major electrical issues uncovered by the pro. 

That’s money well spent, because you avoided a disaster.

Bottom Line

You can do your own home inspection, and you definitely should as a first step. It helps you catch obvious issues and decide if a house is worth pursuing. 

But your walkthrough isn’t a replacement for a professional inspection. 

Pros bring expertise, tools, and objectivity that you simply can’t match on your own.

The best approach is to combine the two. Do your own basic check, then hire a professional to dig deeper. That way, you get peace of mind, protect your investment, and avoid costly surprises after you move in.

10 Things To Check Off When Choosing Your Next Home Inspector

Buying a home is exciting, but let’s be real, it’s also a little nerve-racking. 

You’re about to spend a huge chunk of money, and the last thing you want is to move in and find out the roof leaks or the wiring’s a mess.

That’s where a good home inspector comes in. They’re the person who digs into all the little details you might miss, giving you a clearer picture of what you’re really buying.

But here’s the catch: not all home inspectors are the same. Some are thorough and detail-obsessed, while others might breeze through and miss the stuff that really matters. 

Picking the right one can make all the difference between peace of mind and expensive surprises later.

In this post, we’ll go over 10 things to check off when choosing your next home inspector.

#1 Licensing And Certification

Depending on where you live, home inspectors might be required to have a license to legally operate. Some states are strict about it. Others? Not so much. 

But even if it’s not required where you are, you should still look for someone who’s gone through proper training and gotten certified.

There are a few big organizations you’ll want to keep an eye out for, like:

  • ASHI (American Society of Home Inspectors)
  • InterNACHI (International Association of Certified Home Inspectors)

These groups have standards, ongoing education, and testing, so if your inspector is a member, that’s a good sign they take their work seriously.

Ask to see proof of licensing and certification. 

A legit inspector won’t bat an eye, and they’ll hand it over with confidence.

Also Read: The 12 Types Of Home Inspections

#2 Experience In The Field

There’s no substitute for real-world experience. You want someone who’s been around the block (and inside the basement, attic, and crawlspace). 

Experience brings confidence, sharper instincts, and a better understanding of what to look for.

Choosing A Home Inspector

Ask how long they’ve been doing inspections and how many homes they’ve looked at over the years. Someone who’s done a few hundred inspections is going to spot things that a newbie might miss.

Also worth asking: Have they inspected homes similar to yours? 

If you’re buying an older house, a newer inspector who’s only dealt with recent builds might not catch common issues in vintage properties.

#3 Specialization

Not every home is a cookie-cutter build. If you’re buying a century-old farmhouse, you want an inspector who knows how to deal with older structures. 

If it’s a new build, you’ll want someone familiar with modern materials and building codes.

Specialization matters because different homes come with different risks. 

Historic properties may have outdated wiring. Waterfront homes can hide water damage. Big properties with guest houses or outbuildings may need extra time and attention. 

Finding an inspector who specializes in the type of home you’re buying can save you from a lot of headaches.

Also Read: Do All Popcorn Ceilings Have Asbestos?

#4 Sample Reports

You can learn a lot about a home inspector just by looking at one of their reports.

Ask for a sample. A good report should be clear, detailed, and easy to understand. It should include photos (lots of them), descriptions, and recommendations.

If it looks like it was written in 1998 using a fax machine and a potato – yeah, that’s a red flag. 

You want something that helps you make informed decisions, not something that leaves you more confused than when you started.

#5 Insurance Coverage

This one doesn’t get talked about enough, but it’s super important. 

A good home inspector should have two types of insurance:

  • General liability insurance (covers property damage that happens during the inspection)
  • Errors & omissions (E&O) insurance (covers stuff they might miss that causes problems later)

Say the inspector accidentally knocks over a priceless vase. Or worse, they miss a major issue with the roof and you’re stuck footing the bill. If they’re properly insured, you’ve got a little backup.

So yeah, ask about insurance. It’s not awkward. 

Plus, anyone professional will be happy to confirm they’re covered.

#6 Reputation And Reviews

Online reviews are your best friend here.

Hop on Google, Yelp, or even local Facebook groups. Look for consistent themes in the reviews. 

Are people saying the inspector was thorough, easy to work with, and explained things well? Or are there complaints about rushed inspections, missed problems, or hard-to-understand reports?

Reputation And Reviews

Also, feel free to ask for references. A solid home inspector won’t blink at that request. They’ll likely have a few happy past clients who’ll sing their praises.

Word of mouth goes a long way in this business.

#7 Availability And Turnaround Time

Timing matters when you’re buying a home.

When you need an inspection, you usually need it FAST.

Ask upfront how soon the inspector can fit you in. Some are booked out for a week or two. Others might have flexibility and can squeeze you in within a couple of days.

Then, check how long it’ll take to get the report. Some deliver the same day. Others might take 48 hours. It’s not always a deal-breaker, but if you’re on a tight timeline, you’ll want to know this before you commit.

A great inspector is both thorough and reliable on deadlines – because your deal might depend on it.

Also Read: How Long Does A Home Inspection Take In Virginia?

#8 Prices

Of course, cost matters. But don’t just go with the cheapest option.

Home inspections usually fall in the $300 – $600 range, depending on where you are and how big the house is. Some inspectors charge extra for things like crawl spaces, detached buildings, or specialized equipment.

What you’re really paying for is peace of mind. So ask for a quote upfront, get a breakdown of what’s included, and don’t be afraid to compare a couple options.

Just remember: this is one place where cutting corners can really cost you later.

#9 What’s Included

Not every inspector covers the same things. Some might go deep into electrical systems, while others take more of a surface-level approach. 

Before hiring, make sure you know exactly what’s included.

A solid home inspection usually covers:

  • Roof and attic
  • Foundation and structure
  • Plumbing systems
  • Electrical systems
  • HVAC (heating and cooling)
  • Interior and exterior condition

Extra tests like radon, asbestos, or mold usually aren’t included in the base price, but you can often add them on if needed. 

Always ask upfront so you don’t assume something is covered when it’s not.

#10 Willingness to Answer Questions

This might be the most important one. Seriously.

You want someone who’s cool with questions before, during, and after the inspection. 

The best inspectors are teachers at heart. They’ll point stuff out, explain what it means, and help you understand which issues matter and which ones are just minor quirks.

During the inspection, follow them around if you can. Ask what they’re seeing. Most inspectors love showing off what they know, and it’s a golden opportunity to learn about your future home.

If someone seems annoyed or brushes you off? That’s a hard no.

Also Read: 10 Things That Fail A Home Inspection

Bottom Line

Choosing a home inspector isn’t just another box to check in the buying process. It’s one of the smartest moves you can make to protect yourself, your budget, and your peace of mind. 

The right inspector will dig deep, spot issues you’d never catch, and give you the info you need to make confident decisions.

So go through this checklist before you hire. 

Make sure they’re licensed, experienced, insured, and communicative. Also check reviews, look at a sample report, and confirm what’s included.

At the end of the day, a good inspector is more than just another professional in the process.

Do All Popcorn Ceilings Have Asbestos? (Solved)

Popcorn ceilings were all the rage for a while. It was cheap, easy to apply, and great at hiding imperfections. They were practically everywhere! 

But what was once considered a handy design trick has become a point of concern for many homeowners today. 

If you’ve got that classic textured ceiling in your home, you might be wondering if it’s just outdated… or actually dangerous.

In this post, we’ll shed some light on if all popcorn ceilings have asbestos.

So… Do All Popcorn Ceilings Have Asbestos?

No, not all popcorn ceilings contain asbestos. That’s one of the biggest myths out there. 

Some ceilings were made with it, some weren’t. It really depends on the time period when it was installed and what materials were used.

Popcorn ceilings became popular in the ’50s and stuck around into the ’80s. During that time, asbestos was frequently mixed in because it added fire resistance and durability. But once the health risks became known, manufacturers started pulling back on using asbestos in ceiling materials. 

Also Read: Are All 9×9 Tiles Asbestos?

When Were Popcorn Ceilings Made With Asbestos

Still, that doesn’t mean every ceiling from the ’80s and before is automatically filled with asbestos, and it also doesn’t mean every ceiling after that is completely safe.

When Were Popcorn Ceilings Made With Asbestos?

Asbestos was super common in popcorn ceilings from the 1950s through the late 1970s. That’s when it was used the most in homes and buildings across the U.S. 

But even into the early 1980s, some ceiling textures still contained asbestos, depending on the manufacturer and local building supplies.

Here’s a quick rule of thumb:

  • Before 1980: High chance it contains asbestos
  • 1980 to 1985: Mixed bag, could go either way
  • After 1985: Less likely, but not impossible

Also Read: Does Old Linoleum Contain Asbestos?

One twist here: just because a ceiling was installed in, say, 1987 doesn’t mean it’s asbestos-free. Some contractors and homeowners had leftover materials from earlier years and still used them.

So the install date isn’t always the full story.

How Can You Tell If Yours Has Asbestos?

Okay, so you’re sitting there staring at your popcorn ceiling, wondering if it’s safe. How can you tell if yours has asbestos? 

Well, here’s the thing: you can’t really tell just by looking at it. There’s no obvious way to know unless you get it tested. But there are a few clues that could give you a hint:

  1. If your home was built before the mid-1980s, that increases the chance that asbestos was used.
  2. If the ceiling looks like it was painted or modified at some point, that’s a red flag. 
  3. Popcorn ceilings installed before the 80s tend to have a thicker texture compared to more modern ones.

The most reliable way to know is by testing a sample of the ceiling. 

You can’t do this with just a visual inspection, but it’s easy enough to hire someone to take a sample and send it to a lab for testing. Or, you can do it yourself, but be sure to follow safety guidelines since you don’t want to inhale any fibers.

Also Read: How Long Does A Home Inspection Take?

What to Do If It Does Have Asbestos

So, say you’ve tested your popcorn ceiling, and it does have asbestos. What now? 

First off, don’t freak out. Asbestos only becomes dangerous when it’s disturbed and the fibers are released into the air which usually happens during scraping, sanding, or demolition.

So, if your ceiling is in good shape and nothing is falling off, it’s not an immediate threat.

What to Do If It Does Have Asbestos

If you do need to take action, here are a few options that keep safety front and center:

  • Leave it untouched if it’s solid, sealed, and not flaking or damaged
  • Hire pros to encapsulate it by applying a special coating that locks everything in
  • Go with full removal by a certified asbestos abatement crew if you want it gone
  • Install drywall or ceiling panels over it to safely cover it without disturbing the material

Never attempt DIY removal because it’s risky, and in many places, it’s not even allowed without a license.

What If It’s Asbestos-Free?

If the test comes back clean, that’s great news. 

Now you don’t have to worry about it being dangerous, and you can go ahead with whatever plans you had in mind.

Want to remove it? Go for it. Want to just paint it to freshen things up? Totally doable. You can scrape it, sand it, smooth it out – all without worrying about microscopic fibers flying around. 

Just be sure to wear a mask anyway, because even non-asbestos dust isn’t great for your lungs.

Some people even decide to keep their popcorn ceilings as-is.

A fresh coat of paint can make them look a lot more modern. Or, if you’re feeling bold, you can turn it into a DIY project and completely redo the look.

Bottom Line

All popcorn ceilings do NOT have asbestos. But some do, especially the older ones.

The safest move is to find out what you’re working with before doing anything else. Testing is easy, and it gives you peace of mind. Once you know for sure, you can decide what’s best – leave it alone, seal it up, or hire someone to take it out.

Popcorn ceilings might not be everyone’s style, but they don’t have to be scary. A little info goes a long way when it comes to staying safe and making smart choices for your home.

Can You Sand Lead Paint? (Don’t!)

Wondering if you can sand lead paint?

Short answer: You can, but you really, really shouldn’t.

Lead paint isn’t just “old paint.” It’s dangerous stuff that turns toxic when disturbed. 

Sanding it kicks up a cloud of lead dust, and once that dust is in the air or on your clothes, shoes, or floor, it’s incredibly hard to contain. It gets everywhere, and it sticks around.

Lead exposure is no joke. Even small amounts can cause serious health issues.

In this post we’ll explain why you shouldn’t sand lead paint, and what you can do instead.

What Happens If You Sand Lead Paint?

The second you start sanding, you’re releasing lead dust into the air. 

It’s not visible, but it floats around and settles all over your home. It can stay on your floors, furniture, in vents, and even hitch a ride on your clothes and shoes.

Breathing that dust in? That’s how lead poisoning starts. 

It can affect your nervous system, mess with your kidneys, and do lasting damage to the brain. 

Kids are especially vulnerable because their bodies absorb lead more easily, and their little hands are always touching stuff and ending up in their mouths.

What Happens If I Sand Lead Paint

Also Check Out Our: Virginia Lead Paint Testing Services

Sanding might seem like a quick fix, but it’s opening a can of problems you don’t want.

Is It Ever Safe To Sand Lead Paint?

You should never sand lead paint. It’s super dangerous and a hazard to everyone in the house.

It’s safe to be done only in very specific situations – and with SERIOUS precautions. Professional lead abatement crews can do it safely. They use:

  • Full protective gear (we’re talking full suits, gloves, goggles, and respirators)
  • Sealed-off work areas with plastic sheeting and warning signs
  • HEPA vacuums to catch every bit of dust
  • Special tools designed to minimize dust spread

Unless you’re trained, certified, and have all the right equipment, it’s not something to try yourself. Even then, it’s often a last resort.

For regular homeowners, the answer is just: DON’T.

Also Read: Can You Be In The House During A Radon Test?

What Can You Do Instead Of Sanding Lead Paint?

Instead of sanding, there are a few much safer ways to handle lead paint. These methods allow you to keep your home safe, while still dealing with the paint. 

Let’s take a look at the options:

#1 Encapsulation

Encapsulation is kind of like putting a protective shell over the lead paint. 

You use a special lead-safe coating (usually a thick, durable paint or epoxy) that seals the lead paint underneath. It keeps it from chipping, peeling, or releasing dust.

This works great if the surface is in decent shape. It doesn’t require removing the old paint, so there’s no sanding involved. 

What Can You Do Instead Of Sanding Lead Paint

Just make sure the coating bonds well and that the existing paint isn’t already flaking or loose.

It’s one of the easiest and most affordable fixes out there.

#2 Wet Scraping

If the paint is already peeling or bubbling, you can remove it carefully using a wet scraping method. The key here is moisture. You spray the surface with water before scraping to keep dust from flying up.

This method still requires care. You’ll want to wear protective gear, cover nearby surfaces with plastic sheeting, and clean up thoroughly afterward. A HEPA vacuum helps here, too.

It’s a little messy, but it’s much safer than dry sanding.

#3 Enclosure

Another option is to just cover it up.

You can install new drywall or paneling right over the old painted surface. It seals everything behind the new layer, locking the lead paint away. This is called enclosure, and it works well in areas where the lead paint is intact but you want a fresh look without disturbing it.

Think of it as hiding the problem behind a wall that no one can get to.

It’s especially useful for big areas like walls and ceilings where removal would be a major ordeal.

#4 Professional Removal

Sometimes, the only safe bet is to call in the pros.

Lead abatement professionals are trained to remove lead paint the right way. 

They’ll test the area, set up a contained work zone, and follow all the safety protocols to make sure no dust escapes. Afterward, they do a full cleanup and disposal according to regulations.

It’s not the cheapest option, but it’s worth every penny if you want the lead completely gone. 

Plus, you won’t have to stress about safety.

Also Read: How Much Does Lead Testing Cost?

What To Do If You Think You Have Lead Paint

If you’re dealing with an older house (built before 1978), there’s a good chance you’ve got lead paint somewhere. You can’t tell just by looking so testing is the way to go.

You’ve got two options:

  1. Buy a lead test kit from a hardware store (they’re quick and easy to use)
  2. Hire a lead inspector for a more thorough, lab-based test

Once you know you’re dealing with lead paint, you can plan your next steps. Just don’t sand, scrape, or chip at it until you’re sure what it is.

If you’re a landlord, or doing renovations that disturb painted surfaces, you might also have legal obligations around testing, disclosure, and safety practices. So it’s worth checking local rules.

Bottom Line

Sanding lead paint is just not worth the risk. That dust is dangerous, hard to contain, and can cause real harm. Even a “small project” can turn into a big health hazard fast. 

If you think there’s lead paint in your home, take a step back and test it first. 

Then choose a safe solution – encapsulation, wet scraping, enclosure, or professional removal. Just don’t grab the sander. Your lungs, your home, and your family will thank you for it.

Should I Get A Radon Test With Home Inspection?

Buying a house is a big deal. Between the paperwork, inspections, and trying to picture where your couch will go, there’s a lot going on. So it’s easy to overlook some of the smaller stuff like radon testing.

But here’s the thing: radon might not be on your radar, but it should be. It’s sneaky, it’s invisible, and it could pose a serious health risk.

And you should 100% get a radon test with your home inspection.

In this post, we’ll explain why it’s one of those small steps that could save you a ton of trouble (and money) down the road.

Is Radon Testing Included In A Standard Home Inspection?

No, in most cases. A standard home inspection usually covers all the basics like the roof, plumbing, electrical, foundation, HVAC system, and the general condition of the home. 

But radon testing? That’s usually extra.

You’ll have to request it separately, and it usually comes with a small additional fee. It can cost somewhere in the $100 – $200 range. 

That might sound like just another expense when you’re already spending a lot, but in the grand scheme of things, it’s nothing compared to what it could cost if you skip it and find out later that you’ve got a radon problem on your hands.

Getting A Radon Test With Home Inspection

Also Read: How Much Does A Radon Test Cost?

Should I Get A Radon Test With Home Inspection?

Yes, you should definitely get a radon test with a home inspection.

Here’s why: radon is a naturally occurring radioactive gas that comes from the breakdown of uranium in soil. It seeps up from the ground and can sneak into your home through cracks in the foundation, gaps in flooring, and even tiny openings around pipes.

You can’t see it. You can’t smell it. You can’t taste it. 

The only way to know it’s there is to test for it.

And it’s not just some “maybe” problem – radon is the second leading cause of lung cancer in the U.S., right after smoking. 

That’s not something you want to find out after moving in, especially if it could’ve been handled ahead of time with a simple test.

Reasons To Get Radon Test With Home Inspection

You’ve already got the inspector coming out to check the house from top to bottom. This is the perfect time to just go ahead and get the radon test done, too. Why wait?

Let’s look at a few solid reasons to go for it:

#1 It’s Easier And Cheaper

If you’re already paying for a full home inspection, adding a radon test is super simple. 

The inspector is already there, the equipment’s ready, and it usually only takes a few extra days to get the results. No need to bring someone else out later, schedule a second visit, or juggle extra appointments.

And cost-wise, it’s a small bump compared to the thousands you’re already spending during the buying process, it barely makes a dent. 

But skipping it could end up costing you way more in the long run if high radon levels pop up.

#2 You’ll Know Before Buying

The best part about testing during the home inspection? You get the info before you buy. 

That means you won’t be blindsided later on with a radon problem after the deal is sealed. If the levels come back high, you can stop and figure out your next move before you’re locked into anything.

It’s a chance to make a fully informed decision. You’ll have the data in hand, and you can decide if you want to move forward.

Reasons To Get Radon Test With Home Inspection

Also Read: Can You Be In The House During A Radon Test?

#3 You Can Negotiate Repairs

If the test shows high radon levels, it’s fixable. And better yet, you can use that info as a bargaining chip. This is your moment to talk to the seller and ask them to handle the mitigation or knock a bit off the asking price to cover the cost.

It’s way easier to negotiate repairs like this before you close. 

Once the keys are in your hand, the problem (and the bill) becomes yours. 

So use this opportunity to protect your investment and maybe even save a little cash.

#4 Peace Of Mind

At the end of the day, knowing your new home is safe feels really good. You don’t want to be constantly wondering if something dangerous is floating around in the air. 

Radon might be invisible, but once you test for it, it’s either a non-issue or something you can take care of.

Either way, you’ll sleep better knowing the air in your home is safe for you and your family. 

And if you ever decide to sell down the road, having that radon test done ahead of time is a nice little bonus for future buyers, too. Total win-win.

Also Read: Types Of Home Inspections

What Happens If The Radon Level Is High?

A radon mitigation system is usually the answer. 

These systems pull radon from beneath the house and vent it safely outside, usually with a pipe and fan setup. It’s not invasive and doesn’t require tearing your whole place apart.

Most systems cost between $800 and $1,500 depending on the size and layout of the house. 

Again, not cheap, but way better than leaving it alone. 

And if you catch the issue before buying, you can ask the seller to pay for it, split the cost, or lower the price of the home.

Also, after mitigation, you’ll want to test again just to make sure levels have dropped. Some people even install continuous radon monitors just for peace of mind, but that’s optional.

Bottom Line

Yes, you should get a radon test with your home inspection. It’s quick, it’s affordable, and it could uncover a serious issue before you’re stuck with it. 

Even if everything comes back fine, it’s worth the peace of mind. Radon testing isn’t automatically included in most home inspections, so be sure to ask for it.

You’re already investing a lot into this house, and adding one extra test can help you breathe easier, literally and figuratively.

Can You Be In The House During A Radon Test?

If you’re getting ready to test your home for radon, you might be wondering if you can still live your life while this thing is going on. 

Like, can I cook dinner, hang out, binge a show, or take a nap without ruining the whole test? 

The short answer: yes, you can be in the house during a radon test. But there are a few ground rules to follow to make sure the results come out accurate. 

The good news is, these rules are simple and super manageable.

In this post, we’ll explain if you can be in the house during a radon test.

Can You Be In The House During A Radon Test?

Yes, it’s totally fine to stay in your home during a radon test. 

You can watch TV, make dinner, fold laundry, and do your regular day-to-day stuff as long as you don’t mess with the testing conditions.

To get the most accurate results, you’ll need to follow some specific rules. 

The reason for this is that the test measures radon levels, and even the slightest changes in how the house is ventilated can mess with those readings.

Also Read: How Much Does A Radon Test Cost?

Rules To Follow If You’re In The House For The Test

If you’re planning to stay home during the test (which most people do), you must make sure your indoor air stays stable. That means avoiding anything that could stir things up too much. 

Keep All Windows And Doors Closed

Here’s what to keep in mind:

#1 Keep All Windows And Doors Closed

This one’s big. For the test to give a true reading, the house needs to stay sealed up. 

That means keeping all windows and exterior doors shut for at least 12 hours before the test starts, and keeping them closed the entire time the test is running. 

You can still open doors briefly to come and go, like letting the dog out or grabbing the mail, but no long, breezy open-door moments.

If it’s chilly out, even better – that’s when homes naturally stay sealed, and the test gets a more realistic read.

#2 Don’t Use Fans Or Ventilation Systems

Any fans or systems that pull in air from outside should be turned off. This includes attic fans, whole-house ventilation systems, or anything labeled as “fresh air” exchange. 

They can mess with air pressure inside the home and throw off the test results.

That said, ceiling fans or fans that just circulate indoor air are usually okay. 

Also Read: How Accurate Are Air Mold Tests?

But skip anything that moves air in or out of the house from the outside for now.

#3 Avoid Running Exhaust Fans

Bathroom fans, kitchen range hoods, and clothes dryers all fall into this category. 

They pull air out of the house, and if used a lot, they can create a vacuum effect that draws radon in from the ground faster than usual.

Using them once in a while is fine (like turning on the bathroom fan for a few minutes after a shower) but try not to keep them running constantly. 

Try to keep the air movement minimal and balanced.

#4 Leave The Test Device Alone

This one sounds pretty simple, but it’s worth repeating: don’t mess with the test device. 

Resist the urge to check on it or move it around. Once the device is placed, it needs to stay exactly where it is. Even a small shift could affect the results. 

Don’t put anything on top of it, don’t try to peek at the numbers, and definitely don’t unplug it.

Also Read: How Long Does A Home Inspection Take

#5 Maintain Normal Indoor Temperature

Try to keep the temperature inside the house as normal as possible. 

Maintain Normal Indoor Temperature

68 – 77°F is the sweet spot for radon testing.

If it gets too hot or too cold, air pressure inside your house can change, which affects the way radon moves, which in turn could influence the radon readings.

So just leave your thermostat alone for a couple of days. Set it to what feels good and let it run like normal.

Why These Conditions Matter

All these rules might seem a little picky, but they’re actually super important. 

Radon levels in your house can change based on airflow, pressure, and temperature. 

If you open a window or crank a fan, you’re not getting an honest reading of what the air is really like inside your home on a normal day.

For example, if you open a window or turn on a fan, you might pull in outside air that doesn’t have as much radon, or you could push air out of the house that contains radon.

This would make the test results a lot less accurate.

Radon is always in the air, but its concentration varies depending on airflow. Keeping everything as still and consistent as possible makes sure that the radon test is measuring the natural levels in your home, not the levels impacted by changes in ventilation.

What Happens After The Test?

Once the test is done, you’ll either get instant results (if it’s a digital monitor) or you’ll send the kit off to a lab (if it’s a DIY charcoal canister type). 

If you use a professional service, they’ll usually email or call with results in a day or two.

So what do you do if the radon level is high?

Don’t panic. There are solid fixes out there. Radon mitigation systems are designed to vent radon out from under your home and keep it from coming in. These systems work well and aren’t as invasive or expensive as people often think.

If your levels are low, you’re good to go. No action needed.

However, you might want to test again in a couple of years or if you do any major renovations.

Bottom Line

You can totally stay home during a radon test. Just pretend your house is on “do not disturb” mode for a couple of days. Close up the place, keep things steady, and let the test do its thing.

It’s not a huge deal, but following these basic rules can make all the difference in getting clear, reliable results. 

So, go ahead and relax at home while the test is going on!

The 12 Types Of Home Inspections In Virginia

Thinking about getting a home inspection but not sure which kind you actually need? 

You’re not alone. There are a bunch of different types out there – some cover the whole house, others focus on specific stuff like the roof, plumbing, or even things like mold or radon.

In this post, we’ll give you a rundown of the most common types of home inspections.

#1. General Home Inspections

A general home inspection is the most common type of home inspection, and it will give you a snapshot of the home’s overall condition. 

An inspector looks at all the major systems (plumbing, electrical, HVAC, and structure) to make sure everything is functioning properly. Afterward, they’ll give you a report about what’s in good shape and what might need fixing.

This inspection doesn’t go super deep into every little thing, but it’s a great starting point. 

If the house passes this inspection, you’ll know it’s generally in good shape. If it doesn’t, the inspector will give you a list of repairs that might be needed.

Also Read: Things That Fail A Home Inspection

#2. Roof Inspections

When was the last time you looked at your roof? For most of us, it’s been ages.

A roof inspection checks out the condition of the roof and how much life it has left.

Roof Inspections

Inspectors look at shingles, flashing, gutters, downspouts, and anything else connected to the roof. They’re checking for damage, wear and tear, moss, drainage issues, and spots where water might sneak in.

This inspection is especially helpful if the roof is older, or if you’ve noticed signs like ceiling stains or missing shingles.

#3. Pest Inspections

You’d be surprised at how many homes are infested with pests like termites or ants. 

A pest inspection looks for signs of these critters, which might not be visible at first glance. Termites, for example, can silently eat away at the structure of the house, weakening the foundation over time.

The inspector will check for damage or droppings that indicate pests have moved in. 

If you find out you’ve got a pest problem, you can address it early before it gets worse. No one wants to deal with an infestation after they’ve already moved in!

#4. Mold Inspections

Mold can be a quiet little menace. It grows in damp, dark areas (like the basement and under sinks), and it can spread fast if the moisture issue sticks around. 

A mold inspection helps catch it before it takes over.

The inspector will look for visible mold, of course, but they’re also hunting for the stuff you can’t see. That includes checking for musty smells, water damage, and high humidity spots. 

Some inspectors use moisture meters or thermal cameras to find damp areas behind walls. Others take air samples to test spore levels.

If the inspection turns up mold, you’ll want to take care of it ASAP.

Also Read: How Accurate Are Air Mold Tests?

#5. Radon Inspections

Radon is a colorless, odorless gas that can be seriously dangerous. 

It comes from the natural breakdown of uranium in soil and rock, and it can seep into homes through cracks in foundations and other openings.

Radon inspections involve setting out a monitor, usually for 2 to 4 days. That device checks the radon levels in the home. If the number comes back too high, you might need a radon mitigation system, which usually just means improving ventilation or sealing up entry points.

Testing is especially common during home sales, but honestly, every homeowner should do it at least once.

It’s easy, affordable, and it could seriously protect your health.

#6. Sewer Or Septic Inspections

Out of sight, out of mind… until your tub backs up or your yard starts smelling.

That’s where sewer or septic inspections come in.

If your house is connected to city sewer lines, a sewer inspection involves running a camera through the pipes to check for blockages, cracks, or other issues.

If the home has a septic system, the inspection involves popping the lid off the tank and checking for signs of overflow, leaks, or slow drainage in the drain field.

Sewer and septic problems can be expensive to fix and really unpleasant to live with, so getting an inspection can help you avoid buying a home with expensive plumbing surprises!

Also Read: Sewer Line Camera Inspection Costs

#7. HVAC inspections

The heating and cooling system is easy to forget – until it stops working. 

An HVAC inspection gives you a heads-up before that happens.

The inspector will test both the heating and AC units to see how well they’re running. They’ll look at the furnace, check refrigerant levels, test airflow through the vents, inspect ductwork for leaks, and make sure the thermostat is doing its job.

If the system’s older, they might also check for things like rust, corrosion, or clogged filters. 

An efficient HVAC system can save you money on energy bills, so it’s about the cost, too.

#8. Foundation Inspections

The foundation is literally what holds everything up. If there’s a problem there, it can cause a domino effect throughout the entire house.

Foundation inspections take a close look at all that. 

The inspector checks for cracks in walls or ceilings, uneven floors, and door frames that don’t sit right. Outside, they’ll walk the perimeter to spot cracks, bulging areas, or signs of settling.

They’ll also check crawl spaces or basements if the house has them. 

If they find something concerning, they may suggest bringing in a structural engineer.

Also Read: How Much Does A Foundation Inspection Cost

#9. Electrical Inspections

Electrical issues can be pretty dangerous.

An electrical inspection looks at your home’s electrical system, including the main panel, wiring, outlets, and fixtures.

Electrical Inspections

The inspector will check if your electrical system meets current safety codes. They’ll look for outdated wiring, overloaded circuits, and other potential hazards.

If the system is outdated or there are safety concerns, the inspector will flag them.

If the house has had a lot of upgrades over the years (or if you’re planning a remodel) this kind of inspection can be a lifesaver. Electrical issues are one of the top causes of house fires, so it’s smart to make sure everything’s wired safely.

#10. Plumbing Inspections

A plumbing inspection goes beyond what you’d see in a general home inspection. 

During a plumbing inspection, the inspector checks every faucet, toilet, drain, and visible pipe. They look for leaks, corrosion, water pressure issues, and signs of clogs. In some cases, they might use a camera to inspect the inside of your pipes.

They’ll also take a look at the water heater, check the temperature settings, and see if there’s any buildup or wear.

Plumbing inspections are great before buying a home, but they’re also helpful if you’re dealing with high water bills, strange smells, or water spots you can’t explain.

#11. Lead Paint Inspections

Lead paint is mostly a concern in older homes built before 1978. 

If you have young kids or pregnant women in the house, lead paint can be a serious health risk. 

A lead paint inspection checks for any traces of lead-based paint using special tools (like an XRF analyzer) in places that might be deteriorating, like window sills or door frames.

If lead paint is found, you’ll need to have it removed safely. 

Lead paint that’s in good condition might not be an immediate problem. But if it’s peeling, chipping, or otherwise deteriorating, it should be taken care of.

#12. Asbestos Inspections

Asbestos was used in a ton of building materials up until the late 1970s.

It’s strong, fire-resistant, and good for insulation, but it can cause serious health problems, like lung cancer and mesothelioma, if it’s disturbed and inhaled.

An asbestos inspection identifies materials that might contain asbestos like:

  • Ceiling tiles
  • Pipe insulation
  • Wall plaster
  • Vinyl floor tiles

The inspector will collect small samples and send them to a lab for analysis.

If asbestos is found, don’t panic. It only becomes a problem when it’s disturbed. But if you’re planning renovations or repairs, you’ll want to get it professionally removed.

Bottom Line

So, there you have it  – an overview of the different types of home inspections.

Remember, you don’t necessarily need every single type for every home purchase.

Start with a general inspection, then add specific inspections based on what the general inspector finds and what makes sense for your particular situation.

The more you know about your home’s condition, the better off you’ll be.

How Long Does A Home Inspection Take In Virginia

If you’re buying a home, you’re probably hearing a lot about inspections. And if you’re like most people, your first thought is something like: “Okay, but how long is this gonna take?”

Totally fair. Nobody wants to spend their whole day standing around while someone pokes at pipes and checks outlets.

In this post, we’ll break down how long a home inspection takes in Virginia .

How Long Does A Home Inspection Take?

A full home inspection takes somewhere between 2 to 4 hours from start to finish.

That’s for a typical single-family home. It’s enough time for the inspector to go through everything in detail, take photos, make notes, and answer your questions if you’re there for the walkthrough.

Now you don’t have to follow them around the whole time, but a lot of buyers choose to show up at the end for a quick rundown of the big stuff.

The actual inspection report usually comes later that day or the next, depending on how fast your inspector works.

Also Read: How Much Is A Home Inspection?

Factors That Affect Home Inspection Times

Let’s dig a bit deeper into what exactly affects how long the inspection might take:

#1 Size Of The House

One of the biggest factors is the size of the house. The inspector has more square footage to cover, more rooms to check, and possibly more systems to assess.

How Long Does A Home Inspection Take

For example, a 3-bedroom home might take 2 to 3 hours to inspect, while a 6-bedroom home could stretch closer to 4 hours.

The more space there is, the more work it is for the inspector.

#2 How Old The House Is

Age matters too. Older homes (especially those built before the 1980s) can take longer to inspect because there might be more to check.

Makes sense, right? They’ve had more time to develop character… and problems!

Older homes might have outdated electrical systems, hidden plumbing problems, or issues with the foundation that aren’t as obvious as in newer houses.

Inspecting all of these elements can add extra time.

On the other hand, a newer house might have fewer hidden issues or systems that need deep dives. So, a house built in the last 10 years could be quicker to inspect.

Also Read: 10 Things That Fail A Home Inspection In Virginia

#3 Major Systems

The systems in the house also impact how long an inspection takes.

We’re talking things like the HVAC system, plumbing, electrical, and appliances. Inspectors need to make sure these systems are functioning properly.

If there are a lot of systems in the home, or if any of them are older and complex, the inspector will spend more time on them.

For example, an HVAC system in a 4,000-square-foot home with multiple zones will require more time to inspect than one in a small, single-zone home.

Same goes for the plumbing – more bathrooms and kitchen sinks mean more to check out.

#4 Type Of Foundation

Virginia homes come with various foundation types – from full basements to crawl spaces to concrete slabs. Each presents different inspection challenges.

A clean, empty, and finished basement might only add 20-30 minutes to an inspection.

But a crawl space? That’s a different story! Your inspector has to physically crawl under your house (hence the name), checking for moisture issues, structural problems, pest infestations, and more. This alone can add 30-60 minutes to the inspection time.

Factors That Affect Home Inspection Times

Homes built on concrete slabs are usually quicker to inspect since there’s less accessible area underneath, but the inspector still needs to check carefully for cracks or settling issues.

#5 Inspector’s Experience And Thoroughness

Experience matters a lot. An inspector who’s been in the business for years (like us!) is probably going to be faster at recognizing problems. They’ll have a system down, and they’ll know where to look right away.

But someone newer to the job might take more time.

Both approaches have their pros and cons.

Some inspectors like to do a super detailed, “no stone left unturned” type of inspection, which can stretch things out. Others might work quickly and efficiently, getting the job done in less time.

It’s really about the inspector’s style and how comfortable they are with the property.

Also Read: Is Thermal Imaging Worth It For A Home Inspection?

#6 Weather Conditions

Virginia weather can be unpredictable! Rain, snow, or extreme heat can slow down inspections a lot.

When it’s pouring rain, inspectors might need extra time to check for leaks or drainage issues. They’ll also move more cautiously on wet roofs or slippery surfaces.

During winter, snow might make certain areas inaccessible, like roofs or exterior elements. And in Virginia’s humid summers, inspectors might take longer checking crawl spaces for moisture or mold issues.

The best inspections happen on mild, dry days – but we can’t always control the weather!

#7 Chatty Clients

This one’s a little funny, but it’s true – sometimes the client (that’s you!) can make the inspection take longer.

If you ask tons of questions during the inspection, it’ll take longer. That’s not a bad thing! It’s your future home and your right to understand everything. Just be aware that your involvement adds time.

Some inspectors prefer to work uninterrupted and save questions for the end. Others welcome questions throughout.

Either way, plan to stick around for the entire inspection so you can learn about your potential new home firsthand.

Also Read: How Much Does Lead Testing Cost In Virginia?

Bottom Line

A home inspection takes around 2 – 4 hours in Virginia.

But depending on factors like the size of the house, its age, the systems involved, and even the weather, it could be shorter or longer. It’s really a case-by-case thing.

If you’re planning a home inspection, the best advice is to set aside at least a few hours and be flexible.

Oh and remember that after the physical inspection, your inspector still needs time to compile their report – usually another 24 – 48 hours.

FAQs

How Long Does A Home Inspection Take For A Condo?

Usually around 1 to 2 hours. Condos are smaller and have fewer systems to inspect. Plus, the building handles most of the big stuff, like the roof or HVAC.

How Long Does A Home Inspection Take For A Townhouse?

About 2 to 3 hours. Townhouses fall somewhere between a condo and a full house. Inspectors check shared walls and any systems you’re responsible for.

How Long Is A Home Inspection Good For?

A home inspection is good for about 30 days.

This means that the findings from the inspection are only relevant for that period. If you’re closing on the house within that time frame, the inspection is generally still valid.